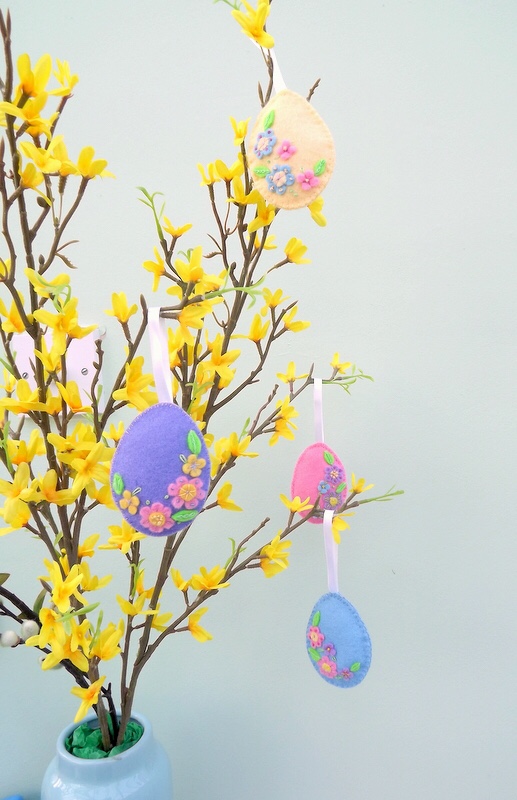
This set of felt Easter eggs is a nice craft for tweens and teens and a great project to complete over the Easter holidays. They look lovely hanging from branches covered in blossom in a brightly coloured vase. If you don’t fancy sewing your own set, you can buy them from my Folksy shop.
You are going to need four different colours of felt to make these a hanging Easter egg. I love using wool felt and usually buy it from the Wool Felt Company (they often have great sales and bags of remnants which are perfect for small projects like this).
You will also need embroidery threads (stranded cotton) in similar colours to your felt. For children who are just learning to sew I would just buy a cheap selection pack like this from Amazon with lots of different colours.
To make the hanging loop you need a small amount of ribbon (if you cut off the little ribbons that sometimes come in new clothes to hold them on hangers this can be a great project to use them up)! Polyester toy stuffing is easy to buy online but you can always use a bit of cotton wool if you don’t want to buy a bag of toy stuffing, especially as these decorations are very unlikely to need washing.
In terms of tools, you will need a lovely, small, sharp pair of scissors (you can’t beat Fiskars Needlework Scissors for this), a needle and either Felt Glue
or a tiny bit of PVA.
Supplies:
- Felt 15cm x8cm for main colour and scraps in three other colours including green.
- Embroidery threads (6 stranded cotton) in matching colours.
- Small amount of toy stuffing (or cotton wool)
- Small length of ribbon (about 10 -15 cm).
- Sharp scissors
- Needle
- Tiny amount of PVA glue/felt glue.
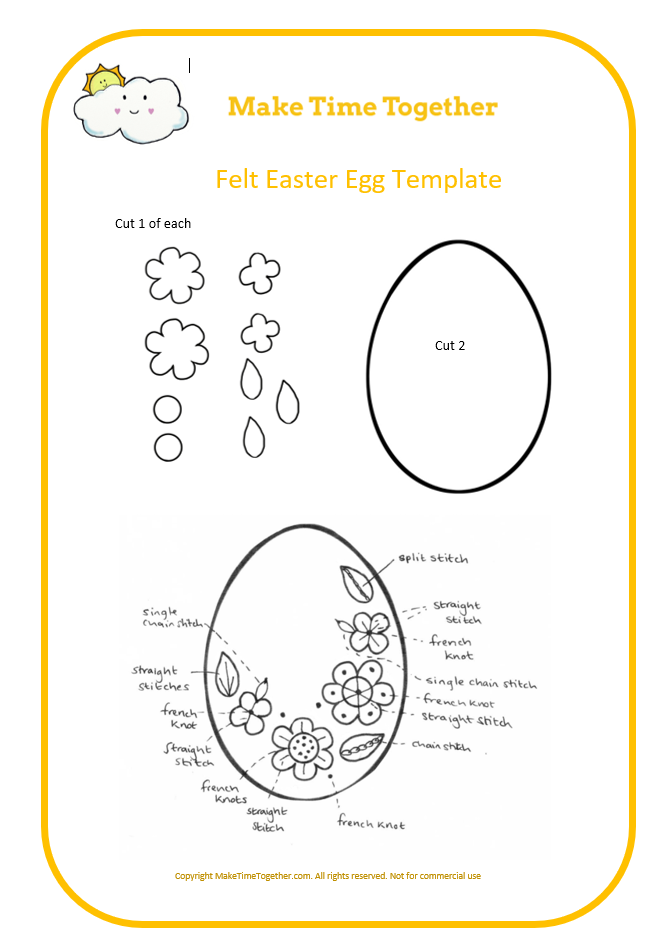
- Pattern
- Print out the template. Draw around the pattern on your chosen colours of felt and carefully cut out the pattern pieces.
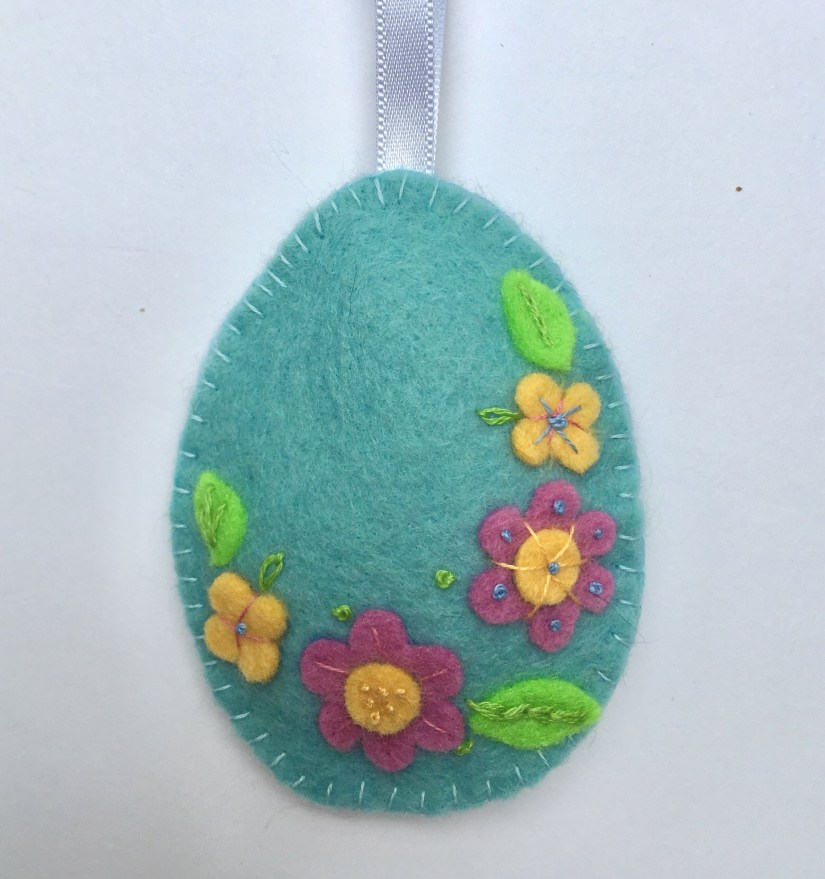
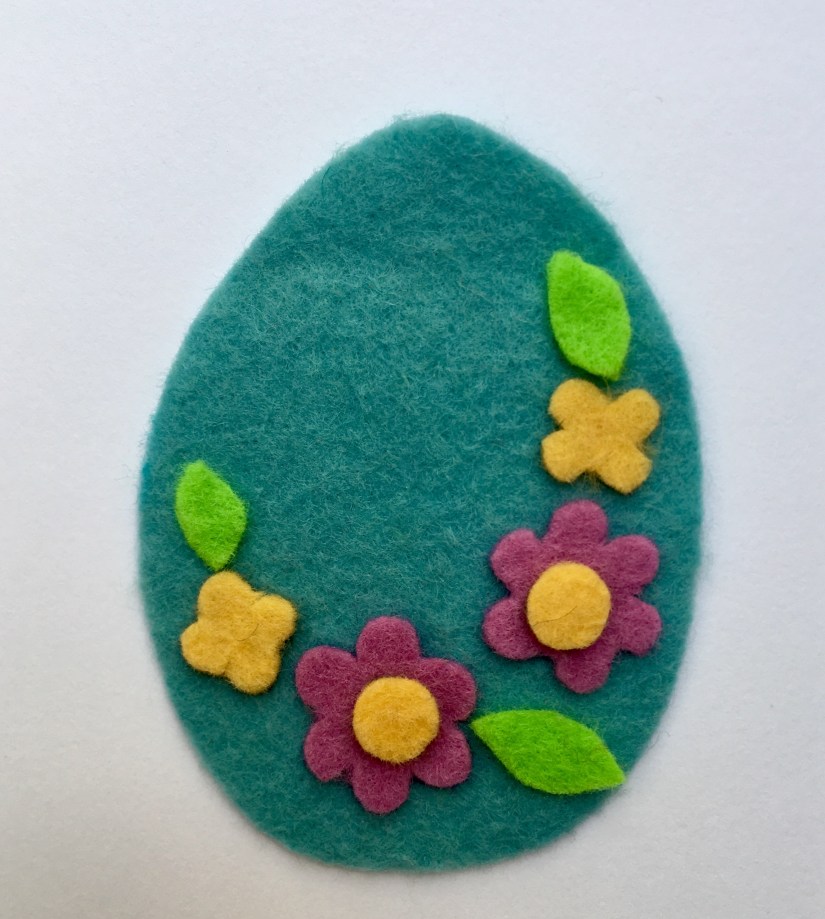
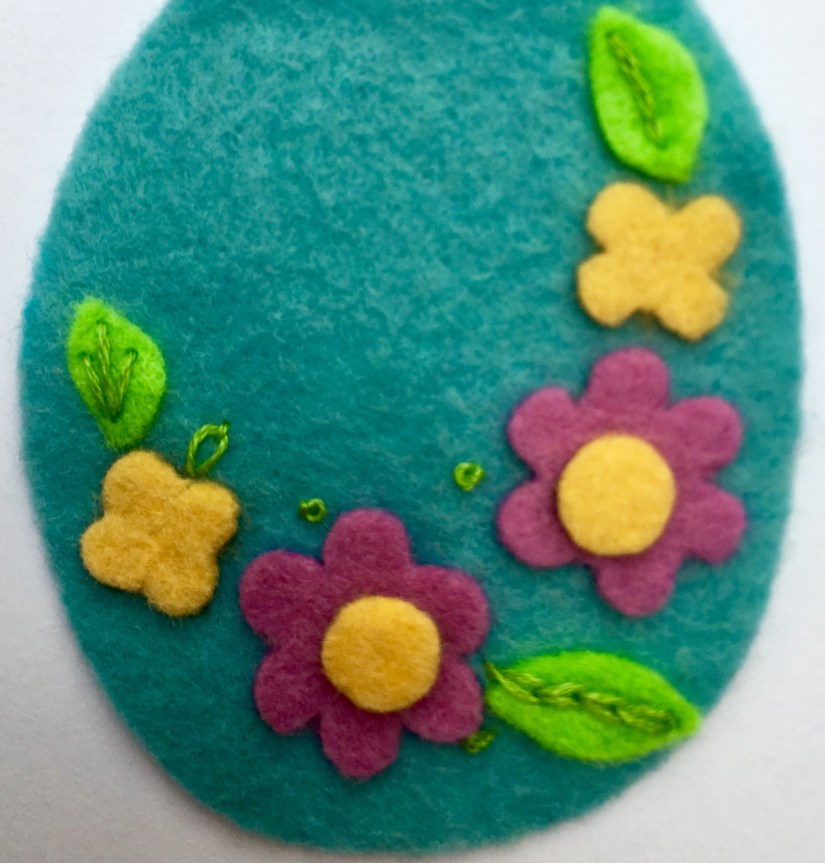
2. Using the picture in the pattern as a guide, glue the flowers and leaves to the front main piece. Use just a tiny, tiny spot of glue as it is just to keep the pieces in place while the embroidery is done and too much glue will make it hard to get the needle through the felt.
3. Using two strands of green embroidery thread, stitch each of the leaves as indicated in the stitch guide. The first leaf has three straight stiches, the second chain stitch and the third split stitch. Then embroider the three French knots around the two large flowers and the single chain stitch (or detached chain stitch) leaves on the small flowers.
4. Using a single strand of a different colour of your embroidery thread (I used pink). Following the stitch guide, straight stitch across the small flowers to form a cross between the petals. Sew a straight stitch down the centre of each petal on the first large flower.
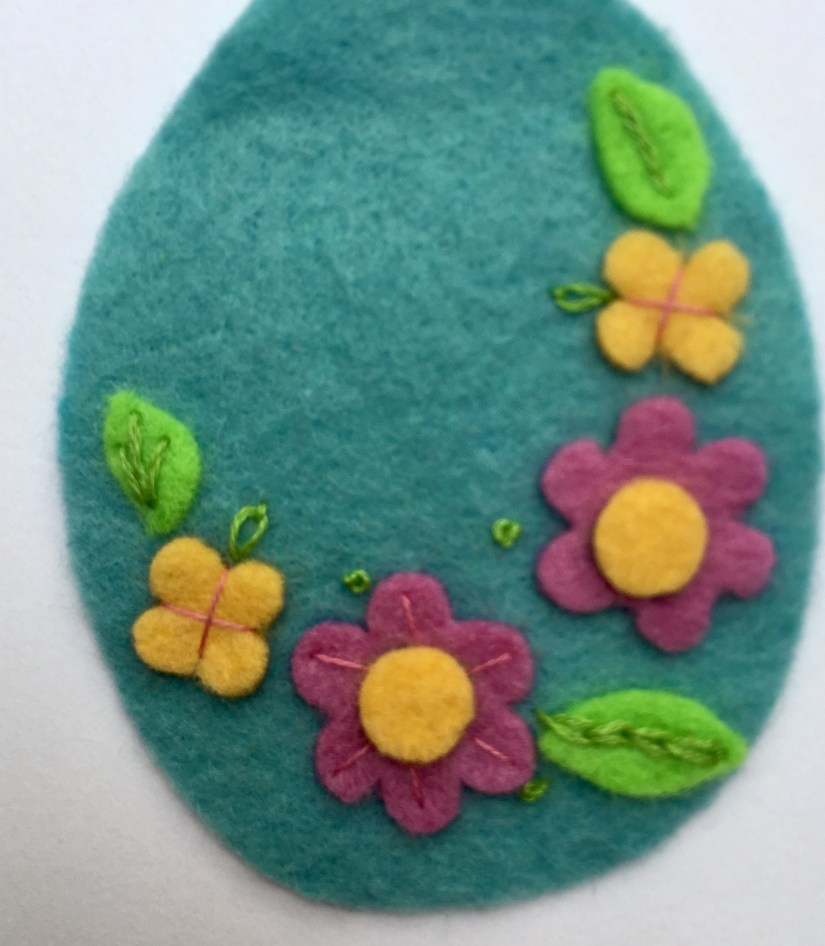
5. Pick your next colour of embroidery thread (I used yellow) and, using a single strand, follow the stitch guide to embroider French knots in the centre of the first large flower and straight stitches from the centre of the second flower to the gap between each petal (see the photo below).
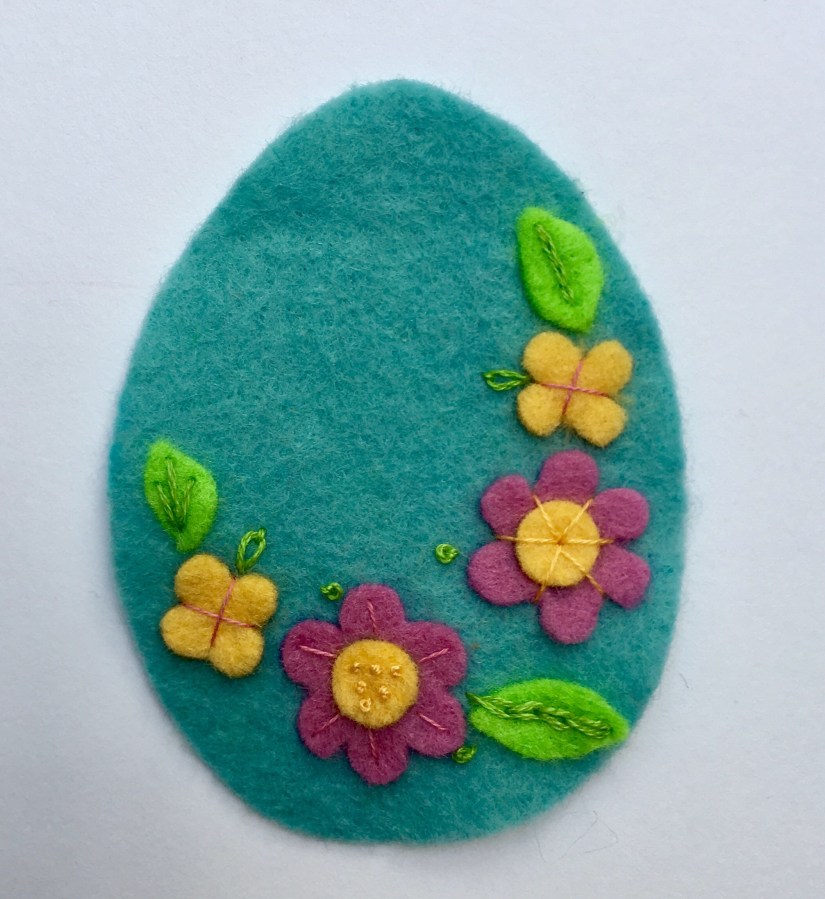
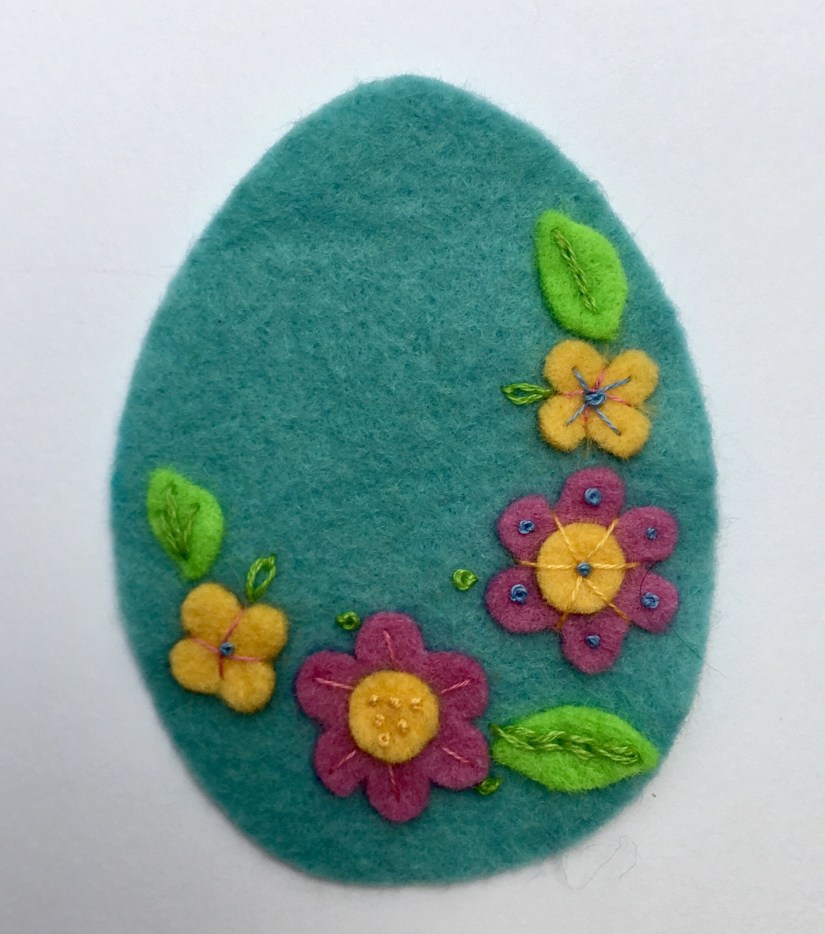
6. It’s time to add the final details in your last colour (I used blue). Using a single strand and looking at the stitch guide for information, embroider straight stitches from the centre of the second small flower down the middle of each petal. Then embroider French knots in the centre of both small flowers and the second large flower.
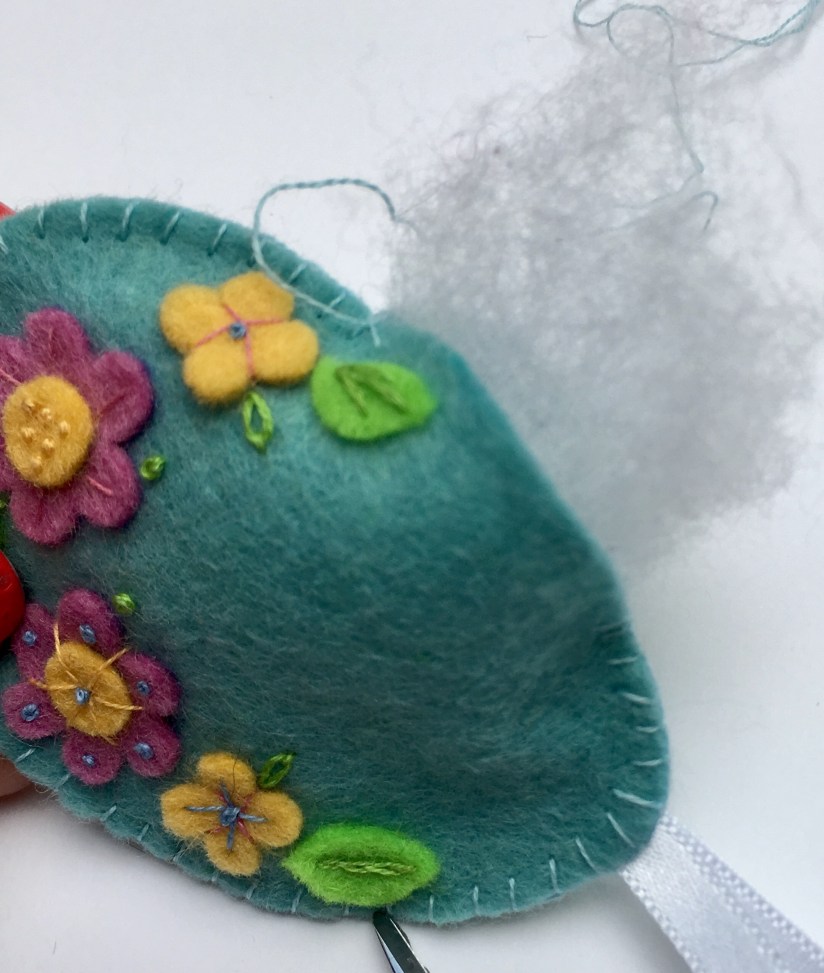
7. Knot the end of the ribbon together to form a loop and pin it to the top of the main egg shape on the wrong side. Pin the front and back egg pieces together with the wrong sides facing. Using one strand of embroidery cotton in the same colour as the felt sew the front and back together using buttonhole stitch. Leave a small gap, about 3 cm wide to add the stuffing.
8. Using a pencil push a small amount of stuffing inside the egg and sew the gap up using buttonhole stitch.
9. You’ve finished! Admire your beautiful felt egg.